Wednesday, December 1, 2010

Snow Day Mini

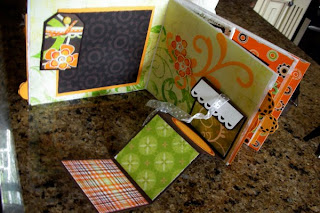
Just before Thanksgiving I made this cute little chipboard mini album.  I was inspired by the Snow Dust paper from Basic Grey.  I created a bunch of embellishments by stamping, embossing and cutting out the images.  Mixed in there are some snow flake stickers, paper poinsettia flowers, and a few die cuts from the Winter wonderland Cricut cartridge.
Here it is a Snow Day Mini


Tuesday, November 9, 2010

Wednesday, November 3, 2010

here it comes....

... the most wonderful time of the year....

Wednesday, October 20, 2010

TWS Oct 2010 Mini Album Swap

This paper bag mini was made for the TWS October mini album swap.  This one was quick and simple, colorful and fun. I used black canvas on the binding and a clear Tim Holtz  fragment tag with a clear epoxy sticker.  My favorite page is the one with the transparency extending beyond the page and the cute little spider sticker...EEK! All the photo mats are pockets for more tags, photos etc.

Monday, October 18, 2010

Halloween ATC

Been very busy working on Halloween projects for swaps.
these are my ATCs for October for a swap on scrapbeach.ning
I made them with a pocket for a tiny tag.

Stay tuned for the TWS Mini Album Swap for Oct 2010!

Wednesday, October 6, 2010

It's October, it's time for Halloween!

I've been working on this mini for a few days now and I love the final effect.  I challenged myself to make each page different and this is the end result. 
This album as well as a few kits to recreate this entire album are available now in my etsy store
The front Cover is shaped like a "haunted house" with a little fence that extends past the edge of the house.  Behind the house is a round "moon" page that can be seen peeking out from behind the house.


The first page has a photo mat and a fence, flowers and branches, followed by the paper bag page that has a large "moon" chipboard circle with a black glittery witch flying by.  This page also holds a large tag the fits inside the paper bag.


The tag that fits into the paper bag and some details from the other side of the paper bag page.  

 Tags that fit into the pocket created by the "moon" and the transparency page with the chipboard skull and tulle bowtie


The back of the transparency page and the tag shaped chipboard page.  Shallow pocket made with fence edge punch.  It holds three stamped tags and is embellished with some bats. The pumpkin page had a photo mat and some halloween themed stamped images as well as a pumpkin stem made from corrugated cardboard and some vine flourishes.
 The back of the pumpkin page has a large flourish the holds three more tags.
 the last page made from corrugated cardboard, painted and glittered, with some more stamped images.


Tuesday, September 21, 2010

TWS September Swap mini

Had lots of fun with this mini for the TWS swap.  Irene and I decided to do a "words and moments" theme.
I made this one just like the paper bag albums but I used 6x9 envelopes instead.  It's a little thinner but still has lots of room for photos and tags. The cover is collaged with images of writing pen and typewriter (words) and clock (moments) as well as paper flower, some bling that was colored with copic markers.  The spine has a D ring with fibers and ribbon and charms.

I added a piece of printed transparency to the half page to create a full page

Saturday, September 18, 2010

TWS September Swap mini

Had lots of fun with this mini for the TWS swap.  Irene and I decided to do a "words and moments" theme.
I made this one just like the paper bag albums but I used 6x9 envelopes instead.  It's a little thinner but still has lots of room for photos and tags. The cover is collaged with images of writing pen and typewriter (words) and clock (moments) as well as paper flower, some bling that was colored with copic markers.  The spine has a D ring with fibers and ribbon and charms.

I added a piece of printed transparency to the half page to create a full page
Still hot hot hot in South Florida, and I'm wishing for cooler weather! Working on some fall projects.
Some cards and tags


Tuesday, August 31, 2010

On the Boardwalk

The last days of summer are fading fast, with the kids already back at school.  But I'm not ready to let go of summer just yet.  I got this great paper from Graphic 45 called On the Boardwalk that's full of nostalgic images of beach and boardwalk and fun by the sea, so naturally I had to make a mini album!  I spent the weekend putting this one together, and while it's not quite finished yet, I just had to put up a sneak peek!
I made it in my favorite paper bag format with a chipboard covers and a canvas binding.  On the cover I used images from the papers, dimensional title stickers from Jolee's, a transparency (mariner's compass) and some flowers that were dipped in melted UTEE.   I'll have more pictures up as soon as I can get it finished.

Monday, August 9, 2010

busy bee

Just wanted to share a little peek at the flowers I've been making for my etsy shop
They are made from crepe paper, painted with twinkling H2O's and embellished with beads, rhinestones and glitter. Sparkle and shine anyone?

Saturday, August 7, 2010

new shelves

just a quick post with my completed "embellishment center" shelves
I really love the way they came out, the perfect size for my cricut carts (ooo now I have room for more!)
I also put my cuttlebug folders and dies, nestabilities dies and some small sizzix dies. There's also plenty of room for lots of brads and eyelets and prima flowers in jars and bottles. And best of all it is easy to see what I have and easy to put stuff away.

Friday, August 6, 2010

Big Idea Festival

he countdown to "back to school" is on and I plan to do lots of scrapping when the kids are back at school. So I decided to go through all my stuff which somehow made its way into several rooms in the house.  How about some ribbon with your waffles, primas with your coffee? No? Well the kitchen island was getting a little overrun with my supplies and it was time to get everything back into its proper place.
I've spent the last several weeks cleaning up and organizing all my stuff and rearranging my scrap room.    It's amazing how much stuff you can forget that you have if you don't periodically organize and take inventory.  And now that all the flowers are together and the embellishments have be sorted, I feel so much better.  Now I know where everything is and how much adhesive, replacement blades and stickles I have.  
It's not quite finished yet but I see the light at the end of the tunnel.  My favorite new things in my scrap room are the embellishment shelves I built (yes that was me with the drill). They will house my flowers, small embellishments and my cricut cartridge library.

They don't look like much here but they've been painted and once they get up on the wall and filled up they will be really functional.  And not a moment too soon because coming this Monday, is... 
Big Picture Scrapbooking
"Over the course of 13 days you'll receive 39 different project and layout ideas from our fabulous instructors!" 


And the best part...it's totally free!

Hopefully I'll be ready by Monday!
Have a great weekend!

Friday, July 30, 2010

A little bit of scraplifting

It's been a while and I've been spending the summer watering the newly flowers, swimming in the pool and organizing my creative space (what a big mess in a tiny room it is).
Today I decided to do a little scraplifting.
I chose this page from the pencil lines blog
I was inspired by the photo subject and the "bull's eye"  title as well as the flag border that I have seen popping up all over the place lately.
Here's my take on that page.

Remember the Coluzzle?  With all the great cutting machines out there, the coluzzle is so old school but I still like it for a quick basic shape. My blade was rather dull and left the edges kind of rough which were even more obvious because of the white core of the paper I used, but I really like the look of it for this page.

Another thing I did on this page was create the two toned string and orange flag banner.  I love the look of the red and white baker's twine from Papertrey Ink but I didn't have any and I needed it now! So I took some waxed linen thread in white and twisted it up with some red floss and voila! Not perfect, but not bad in a pinch.  The flags I just cut by hand from scraps of paper, the put epoxy letter stickers on top.
Wednesday, June 23, 2010

More Summer Fun

I recently found this fun Bo Bunny Sticker sheet that was just perfect for a mini about summer treats, barbecue and lemonade and of course I just had to make another paper bag album (it's an obsession, I know!) Here are a few pages from the book...

Friday, June 18, 2010

Father's Day Project

I just wanted to share a little project I did with my boys for Father's Day.  I got a plain wood frame from Michael's and painted it in white, cream and a little gold.  I had my boys draw some pictures on copy paper, which we then traced onto tissue paper with a fine pigment pen.  I carefully cut around each drawing,  and used it as a guide to put down some color on the frame, the using gel medium, glued each drawing onto the colored area.  The fine lines are perfectly clear, and the tissue paper disappears.  We then added a little more color, distressing the edges of the frame with more gold paint and there we have it, a photo frame for Dad with drawings from the kids.


Have a great weekend and Happy Father's Day!

Thursday, June 10, 2010

Oh Boy!

There are so many fabulous scrapbooking paper lines out there for boys these days.  I remember when I first started back in the early 90's. There wasn't much product especially masculine stuff appropriate for boys. I recently found this fun line from WRMK It has a retro feel with rocket ships, gears, cars and helicopters and nice gold foil detail.  Of course I had to turn it into another one of my favorite paper bag minis.  Check it out!